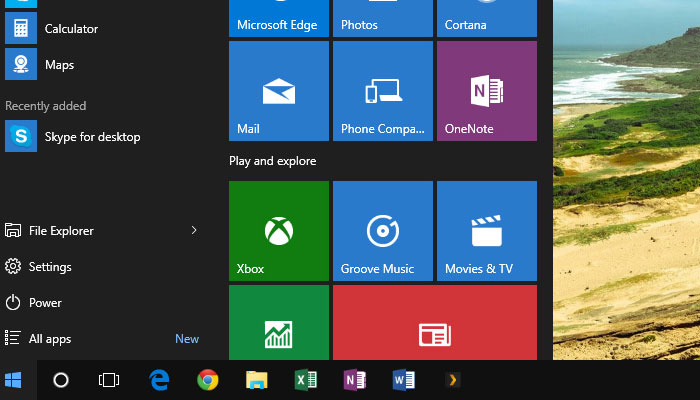
Many users across the globe have been reporting that their Windows 10 Taskbar is not working and often freezes. Sometimes Windows 10 taskbar and start menu not working all together could be a nightmare. You are left with very little options and your day is doomed. But here are a few solutions to recover your taskbar back from the dead state.
Contents [show]
Windows 10 Taskbar Not Working
If you have tried your best to fix the Windows 10 taskbar but nothing worked, give a try to the fixes mentioned below. We are quite sure that they will fix your problem permanently.
1. Restart Windows Explorer
If Taskbar is not working on Windows 10, the simplest and quickest solution to is to restart your Windows Explorer.
1). Open your Task Manager or press Ctrl + Shift + Esc. This should bring up your task manager.
2). The Process Tab is the first tab to be opened. If not, select Process.
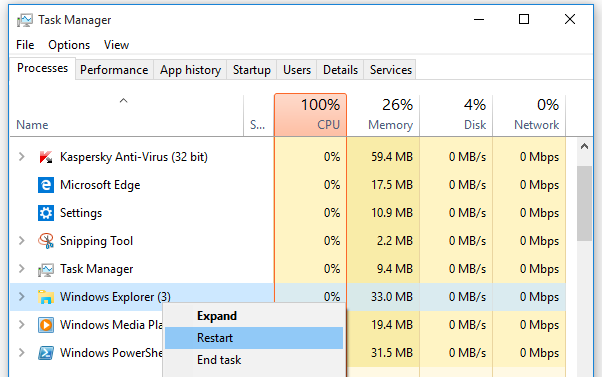
3). Right click on Windows Explorer and Click Restart as shown in the image below.
Now check if Taskbar is still not working on Windows 10. If it is the case, check out the next solution.
2. Update Drivers
Windows automatically updates drivers every now and then and this may have caused conflicts with apps and other programs which might be the reason your taskbar is not working on Windows 10. Either you can Install a third-party driver update software or do it manually. Software such as Driver Easy or Driver Talent could get the job done for you. Alternatively, you can download the drivers from Intel’s website if you are sure of the hardware used.
3. Windows Powershell
As the name suggests it could fix many problems including the Windows 10 taskbar and start menu not working issues.
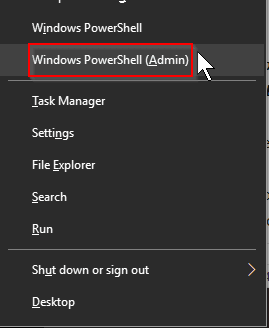
1). Press Windows Key + X, and open “Windows Powershell (Admin).”
2). Type or copy the following and press Enter.
Get-AppXPackage -AllUsers | Foreach {Add-AppxPackage -DisableDevelopmentMode -Register “$($_.InstallLocation)\AppXManifest.xml”}

4). Close Powershell
5). Go to:C:/Users/name/AppData/Local/ in your Windows Explorer. The name under users should be your username.
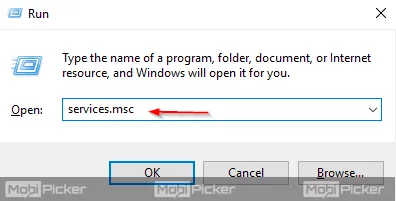
6). Look for the TileDataLayer folder and delete it. Chances are, Windows might prevent you from deleting the folder. If that is the case, then press Windows + R to bring up the Run dialog box.
7). Type services.msc. It will open up the service manager window. Search for TileDataLayer and stop it from being processed.
8). Now try deleting the folder under Windows Explorer.
9). Restart your system for changes to take place.
This should bring back the windows 10 taskbar back to normal.
4. Remove Packages through Powershell
This option could erase all the apps in your taskbar and even in your store.
1). Open Windows Powershell (Admin) as shown in the above method.

2). Type or copy the following and hit Enter
Get-AppxPackage | Remove-AppxPackage Get-AppxProvisionedPackage -Online | Remove-AppxProvisionedPackage –online

3). Close the command prompt and restart the system
4). Voila! Windows 10 taskbar and menu should work as usual.
Also Fix: Windows was unable to complete the format
5. Create a New User
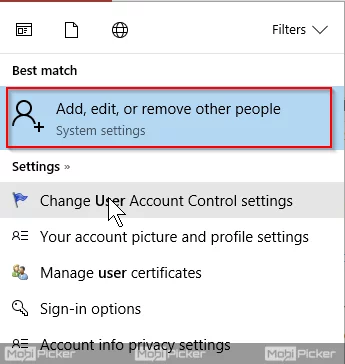
1). To create a new account, search “user” in the Windows 10 search bar. Select “Add, edit, or remove other people”
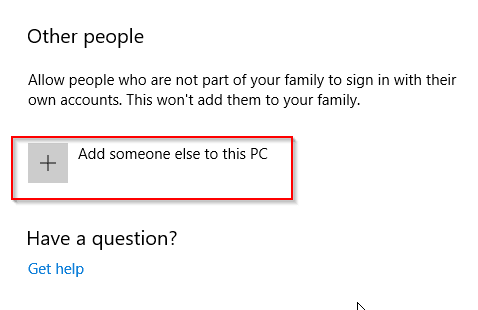
2). Click Add an Account under Other account
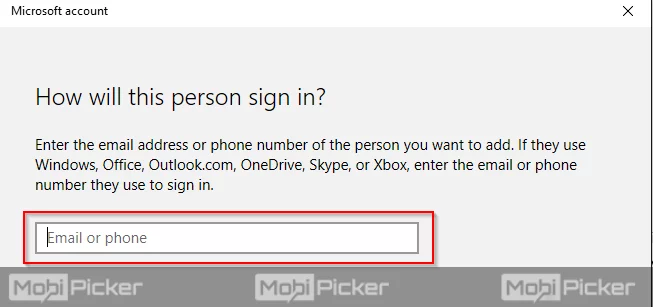
3). Now, Windows will prompt you to enter email id for the new user. Enter the email id and click “Next”
4). The new user is now added. The PC must be connected to internet for the first time login.

5). Now under the users tab, you should see the new user. Click on the user and choose “Change Account Type”.
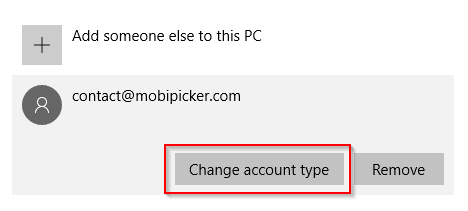
6). Make the new user and Administrator.
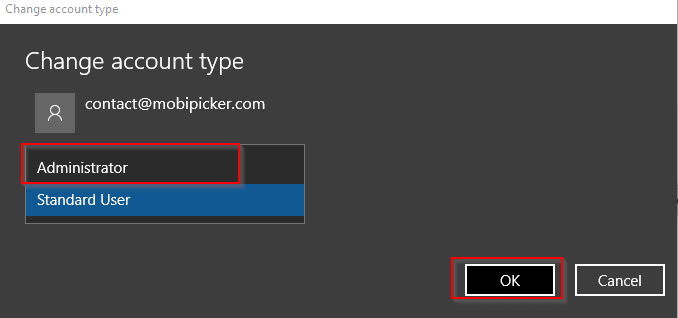
7). Restart the system and try logging in with the new account.
Also Fix: This copy of windows is not genuine
The solutions mentioned above should fix the problem if your Windows 10 taskbar is not working. If you are get the issues and could not fix with the steps mentioned above, comment below. We will log in to your issue and will try to help you fix that without any trouble.
