Looking for ways to restore/recover hard drive data on Mac devices? This post is all about that – the steps that you need to follow to restore and recover hard drive data. When your MacBook Pro, Air, and iMac were brand new, they were amazingly fast with good enough response times. But as days passed by, you began to notice that your favorite Mac slowed down. What once used to work like a charm now acts very lazy and we all know how frustrating slow response times can be!

One option of getting your MacBook to work like it used to before is to restore it to original settings. When you restore your MacBook, it removes any malware/virus that caused it to slow down. Restoring prepares your Mac for a fresh install of OS X.
How to Restore / Recover Hard Drive Data on MacBook Pro, MacBook Air, and iMac
Restoring MacBook wipes out all hard drive data including widgets and installed applications. So, it’s highly recommended to create a backup of your hard drive data before restoring. Creating a backup ensures a safety of your important documents and data. There are two popular ways of creating a backup – one using Time Machine and the other using Mac clone application. In this post, we’ll talk about how to backup your hard drive data using Time Machine.
Also check: How to create macOS Sierra USB Install Drive
Mac Backup using Time Machine
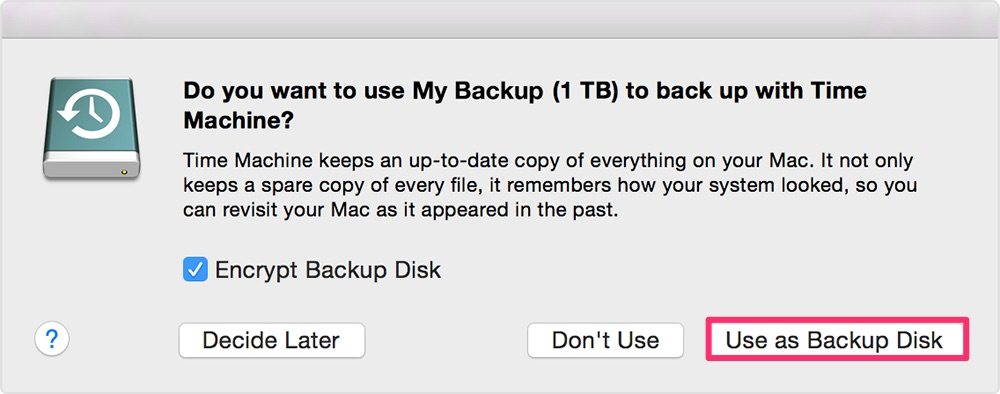
Apple offers a built-in feature to backup data. Using Time Machine, you can backup data before restoring your MacBook. All you need is an external hard drive. When you connect an external hard drive directly to Mac, you will be asked if you want to use this hard drive to backup with Time Machine. When prompted with this message, select Use as Backup Disc.

Once you have the external hard drive set as backup disc, Click on Backup Now from the Time Machine menu to immediately backup. Your first backup is bound to take a long time. So be patient. If you have too many files in your MacBook, the backup will obviously take longer.

Restore MacBook Pro
Now that you have a backup of all the important data, you are ready to restore your MacBook Pro. Follow these steps –
- Switch off MacBook Pro and then switch it on using the power button. Once it starts, press Option key to bring up the startup drive menu.
- In the startup drive menu, you’ll see Macintosh HD and Recovery HD as the two available disks. Select Recovery HD.
- OS X utilities will begin to load and you will see them on the screen after a while. OS X utilities offer a few options that you can perform on Macintosh HD – (a) restore from Time Machine Backup (b) Reinstall OS X (c) Get Help Online (d) Disk utility
- Click on Disk Utility. Select Macintosh HD and head to Erase Tab. Make sure you have these settings –
- Drive Format: Mac OS X (Journaled)
- Drive Name: Macintosh HD
- Click Erase to format Macintosh HD. This is the step which wipes out all data on Macintosh HD. And this is why we told you to create a backup of all the important data. After the process is complete, you can now reinstall OS X.
Reinstall OS X on MacBook Pro
Head to OS X utilities and select Reinstall Mac OS X. The installation begins and a basic set of applications bundled with the OS by default will be installed.
Now, it’s time to understand how you can recover data.
Fix: iPhone Touch Screen Not Working
Recover Data on Mac Hard Drive
When you are formatting, anything can go wrong. Sometimes, data losses happen for no reason at all. There are a number of applications that come handy in such situations and help to keep your data safe. For example, Data Recovery Free by Softote Studio is one such application. Visit Mac App Store for more info about the application.
Restoring and recovering process on MacBook Pro, MacBook Air, and iMac is same, so it doesn’t make any difference which device you are using. We are sure you are now familiar with the steps and the precautions that you need to take for successfully restoring and recovering hard drive data. Hope this post helped you fix your MacBook and made it work just the way it used to work before – fast and flawless. Let us know the troubles you faced and also your experiences in the comments section.
