Kodi is one of the most popular media center solutions available today. In case you have been hibernating and haven’t been able to catch up on the latest developments in Kodi, we must tell you – a new version of Kodi 17 called Krypton arrived recently. The new version’s most notable feature is the inclusion of a new default skin called Estuary, with Estouchy as the special version for touchscreen devices. If you have been scouting the internet for information on how to install Quasar on Kodi 17 Krypton, you’re at the right place! Quasar is basically a video add-on for Kodi which helps you stream movies and TV shows using BitTorrent. This post will cover everything you need to know about how to install Quasar on Kodi 17 Krypton. Let’s get started!

How to install Quasar on Kodi 17 Krypton
To install Quasar on Kodi 17 Krypton, follow the steps outlined below. But before we install Quasar, we need to download the installation zip file. Head straight to Quasar official site and download the latest version for your system. Note the download location of the zip file. We’ll need this file later. Now, follow these steps –
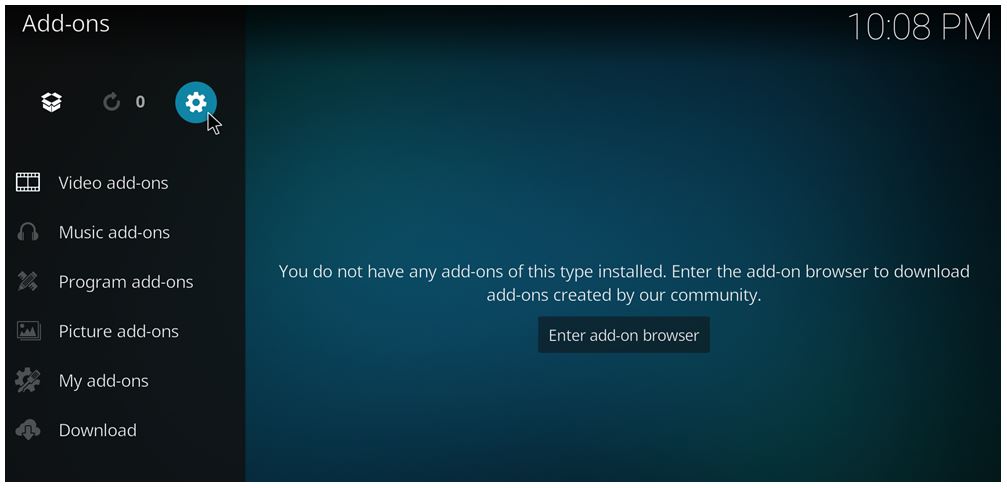
Step 1: In the home screen, click on Add-ons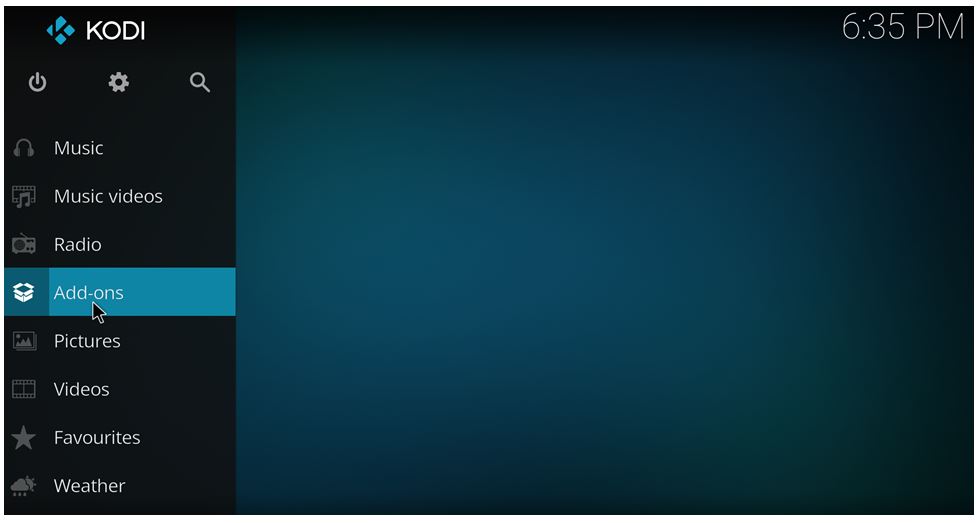 Step 2: Now Click on the Settings icon that you see on the top left
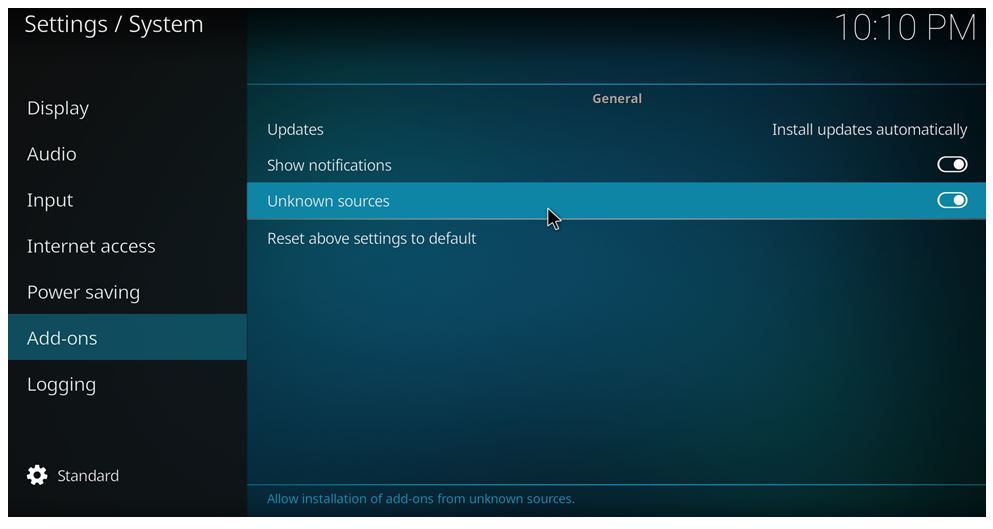
 Step 3: Head to Add-ons. Ensure “Unknown sources” is enabled.
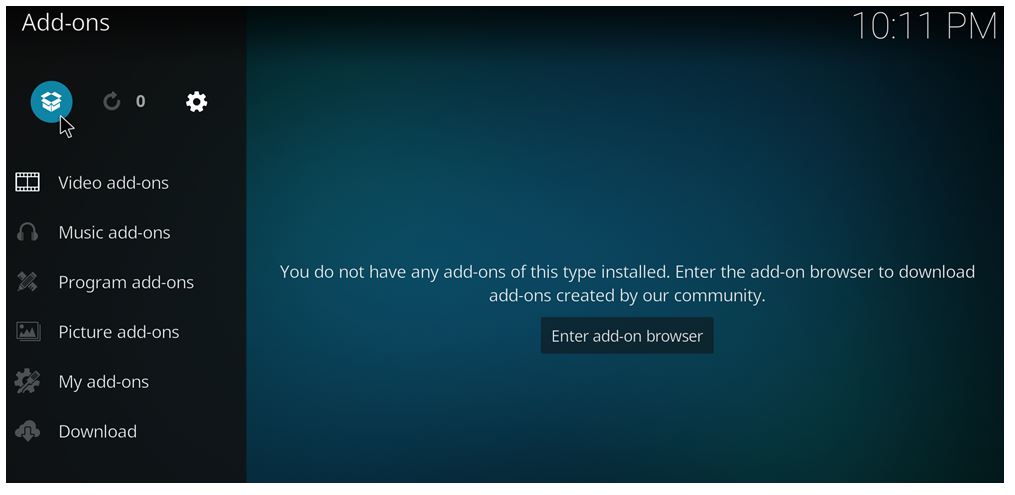
 Step 4: Head back to the Add-ons screen. Select Add-on Browser icon that you see on the top left.
 Step 5: Select Install from ZIP file
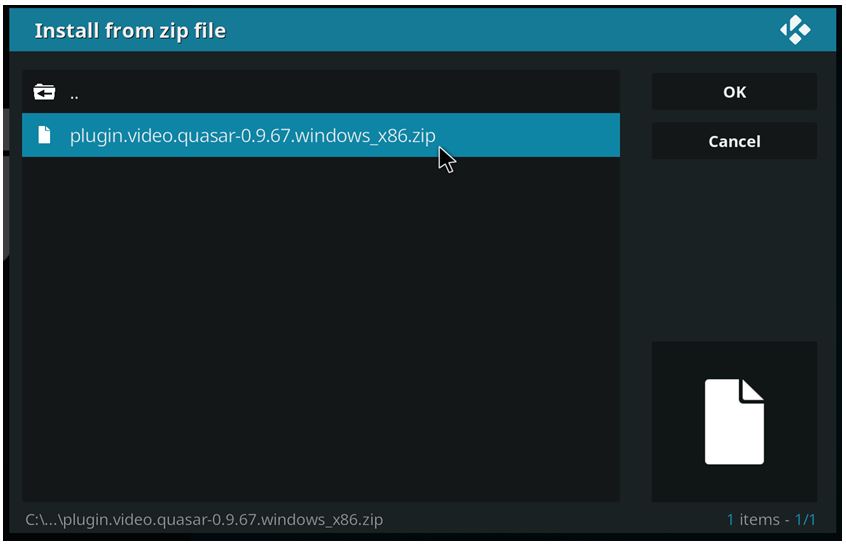
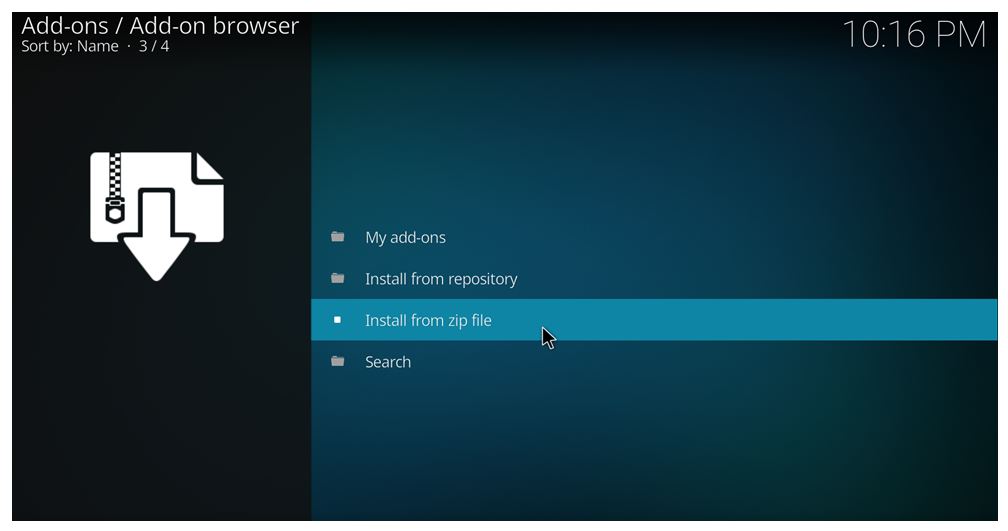 Step 6: Navigate to the location where you downloaded the .zip file from the website. Click on the .zip file to begin the installation.
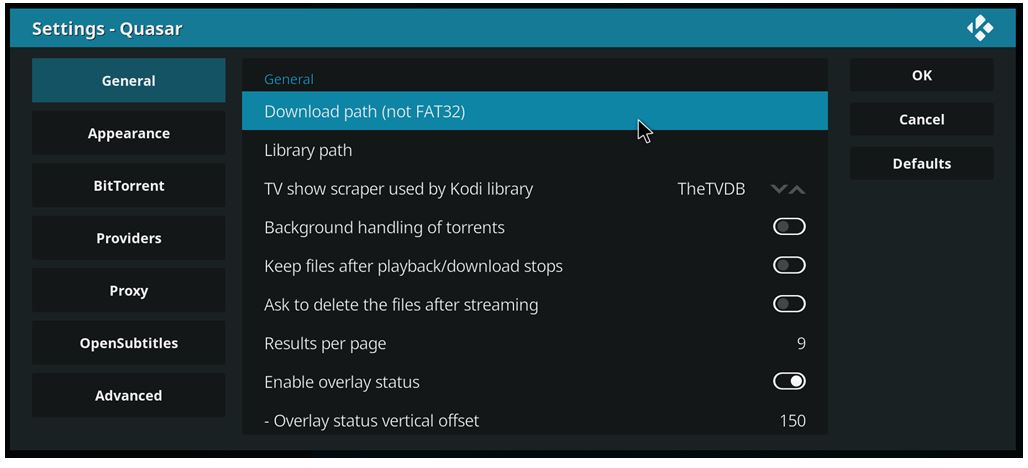
 Step 7: After 5 seconds or so, you will see a dialog window about Quasar Settings. Select Download path (not FAT32) and select a folder where Quasar can temporarily store files. You can select an already existing folder or create a new one as per your convenience.
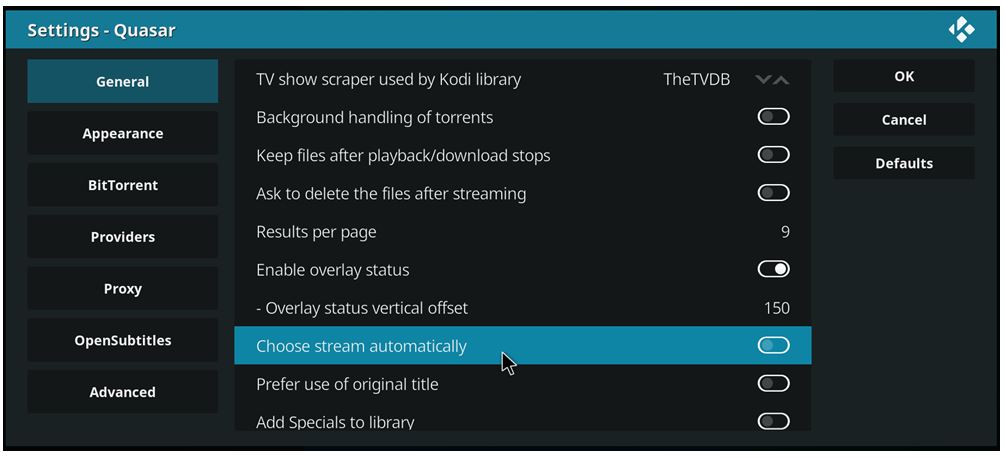
 Step 8 (Optional): If you wish to see a list of available torrents instead of letting Quasar decide automatically, you have to disable Choose stream automatically option in the General tab.
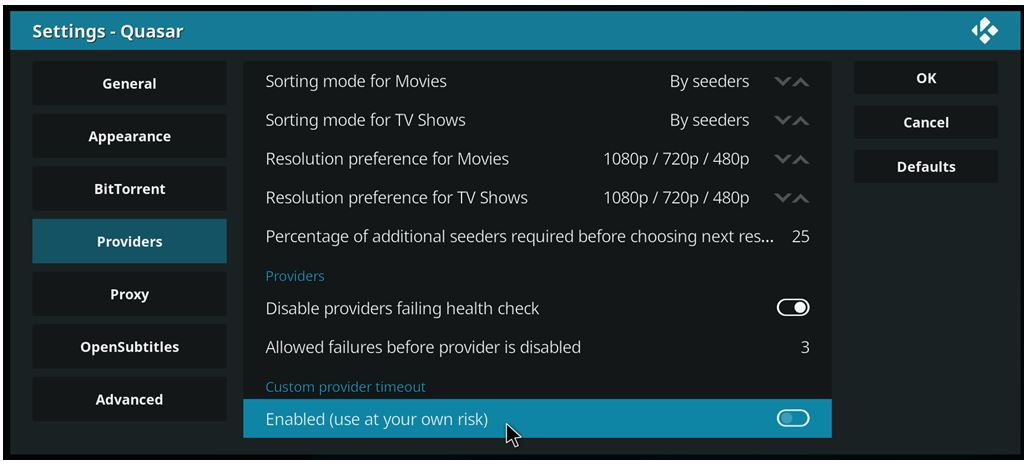
 Step 9 (Optional): If you wish to use Magnetic as the provider, head to Providers and enable Custom provider timeout. You can set the timer to 15 seconds. Press OK. This step is optional because you can skip it if you wish to use Quasar Burst.
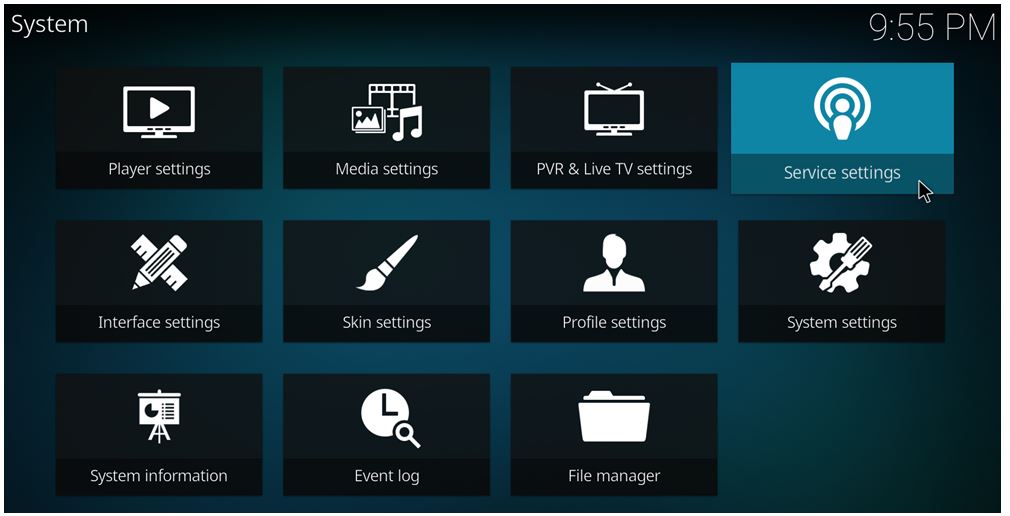
 Step 10: We now have to change some settings in Service Settings option. Head to the home screen and click on Settings (gear icon on the top left). Then select Service settings.
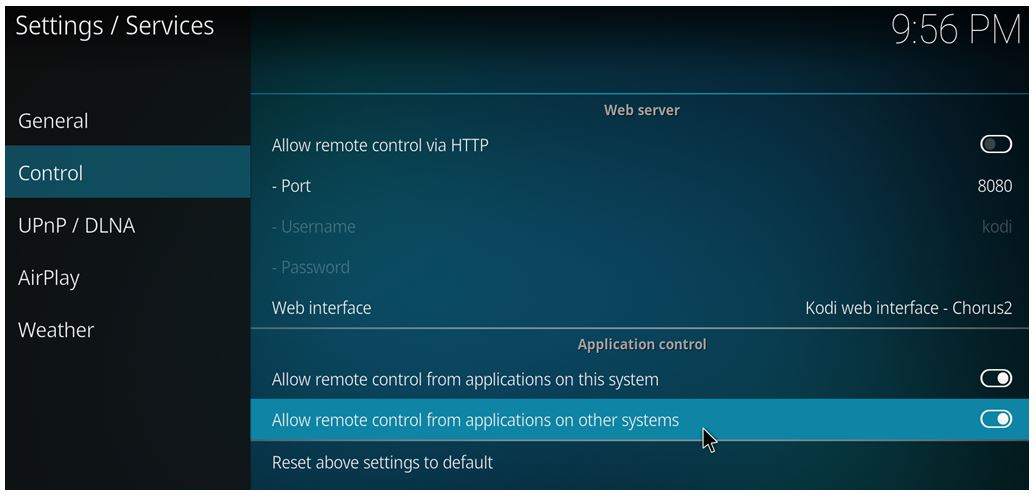
 Step 11: Head to Control Tab and enable Allow remote control from applications on this system. Also, enable Allow remote control from applications on other systems.
That’s all, folks! As simple as that! If you wish to let your friends know how to install Quasar on Kodi 17 Krypton, do share this post. Let us know if you faced any issues while following the steps we outlined in this post. Feel free to post in the comments section.
Related
