A macOS Sierra USB install drive is necessary when you wish to perform a clean install of macOS Sierra. Having a USB install drive is advantageous because it’s portable. For users who wish to upgrade multiple Macs or install macOS from scratch, creating a USB install drive is the best option. This post will give you a detailed step-by-step guide on how exactly to create a macOS Sierra USB install drive.
How to Create macOS Sierra USB Install Drive
What you need
1. USB Drive: To get started, you’ll need an 8GB (at least) USB 2.0 or USB 3.0 drive. This drive will be wiped clean before creating the install drive. So make sure you have already copied all the important data from the USB drive to your computer or external hard disk.
2. MacOS Sierra Installer: Download the operating system from Mac App Store. If you are a registered developer, you’ll receive a redemption code for the OS from Apple Developer portal. If you aren’t a registered developer/beta tester, we must warn you that using installers from other sources can result in a violation of Apple’s licensing agreements. Other sources cannot be trusted and may even contain malware. We suggest you to exercise caution before downloading from other sources.
After you have downloaded, close the install pop-up and note down the name of the installer. It could be something like Install 10.12 Developer Preview.app. You should be able to find this in /Applications/folder.
Once you have completed the above requirements, get started with the following steps to create a macOS Sierra USB install drive.
Also fix: iMessage Not Working on iPhone
Step-by-step guide to create macOS Sierra USB install drive
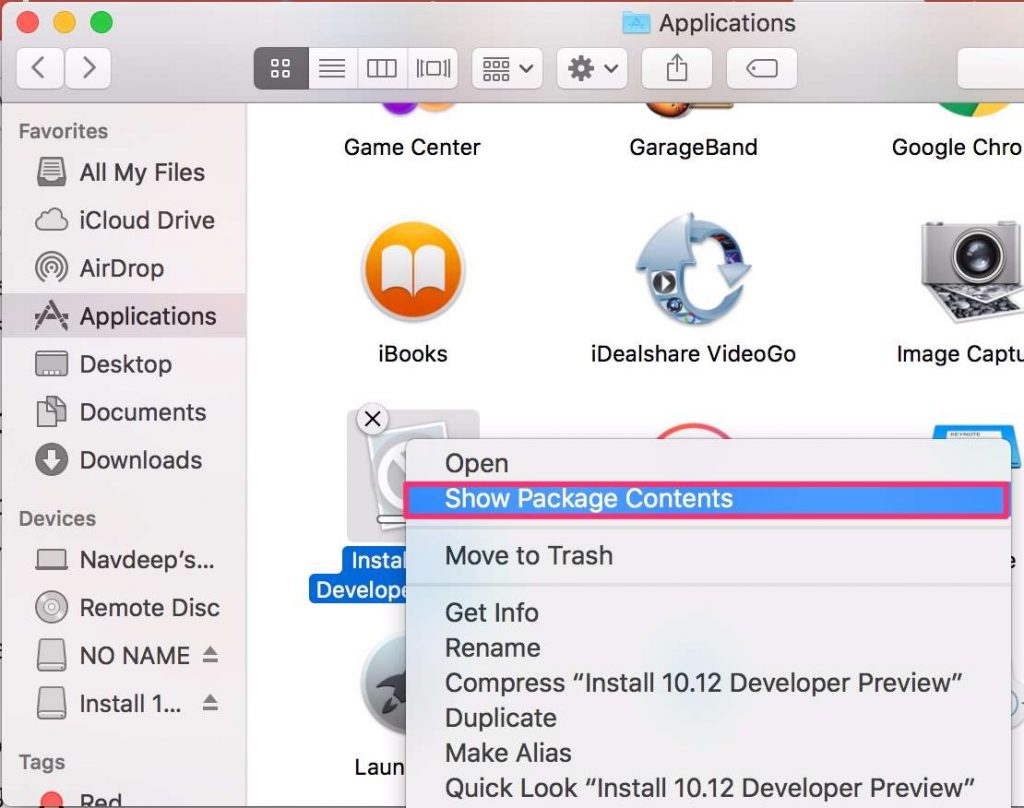
1. Open Finder. Head to Applications. Right click on Install 10.12 Developer Preview and select Show Package Contents.
2. Head to Contents -> Resources.
3. You will now need a terminal to enter some commands. Open a terminal window using Applications -> Utilities -> Terminal
4. In the terminal, type sudo followed by a space. Typing sudo allows you to run programs with security privileges of the superuser.
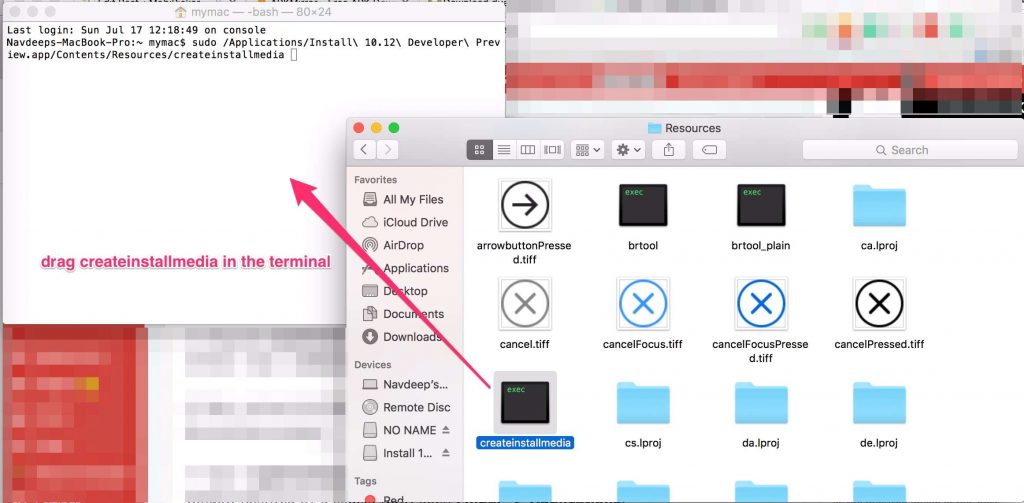
5. Drag the createinstallmedia file from the window opened in Step 2 to the terminal window. Type –volume (two dashes followed by volume) followed by a space.
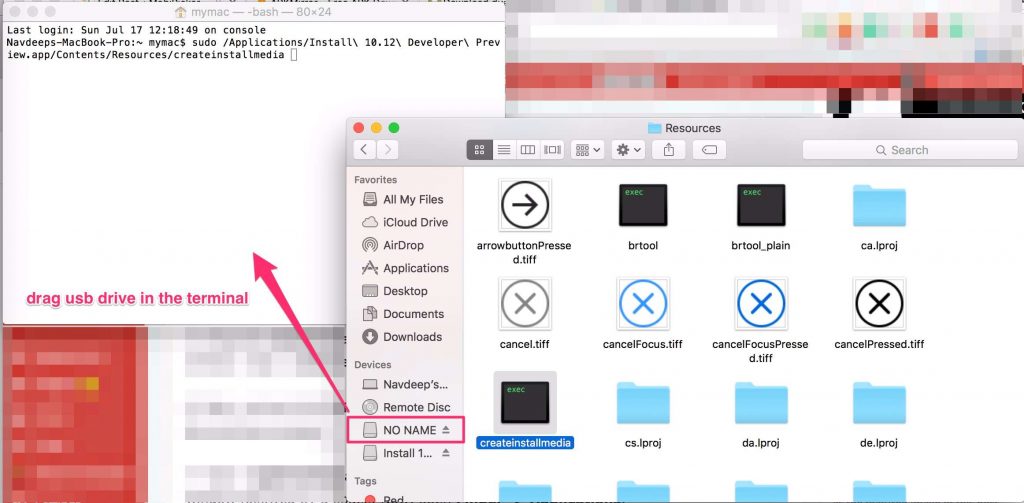
6. Now, connect the USB drive on which you wish to create the installer and drag it into the terminal window.
7. Type –applicationpath (two dashes followed by applicationpath) in the terminal window followed by a space. Now, open Finder -> Applications.
8. Drag the Install 10.12 Developer Preview into the Terminal window.
9. Press return on the keyboard to execute the command. When prompted, type ‘Y‘ to mean yes. Press return.
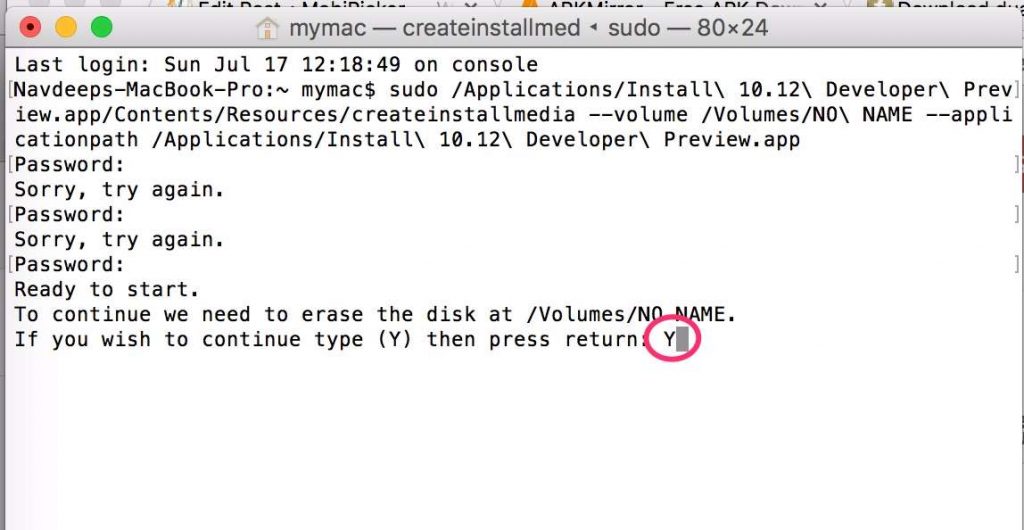
10. Now, the install process begins by wiping out your USB clean. All the installer files will be copied to the USB. Patience is the key here since the whole process may take anywhere between 20-30 minutes.
Once step 10 is complete, you’ll have with you a portable macOS Sierra USB install drive. Cool, isn’t it? Using a portable USB install drive is the best way to perform a clean install of macOS.
Now that you have created a macOS Sierra USB install drive, we know that you would also want to understand how to boot the Mac from the USB installer.
Also fix: iMessage Waiting for Activation
How to Boot Mac from USB Installer
- Switch off your Mac by clicking the Apple logo in the top left corner of your screen by selecting “Shut Down…“
- After your Mac has completely switched off, press the Power button on the keyboard to switch on Mac.
- While your Mac is being turned on, hold the “Option” key to choose a drive from where you want your Mac booted from
- Select USB installer from the list in the boot menu. The installation of macOS Sierra should begin.
Stick to the instructions that follow and you should be good to go!
Creating a macOS Sierra USB install drive isn’t that hard after all. We would love to hear your experiences about creating the install drive and installing the macOS Sierra. Feel free to put your thoughts down in the comments section!
