Disappointed with WiFi not working on iPhone? We know how it feels when you so eagerly want to watch videos online but your iPhone simply refuses to connect to WiFi. This can get even more annoying when you can’t figure out why your iPhone isn’t connecting to WiFi. We are here to help you fix this annoying problem of WiFi not working on iPhone.
Why WiFi Not Working on iPhone?
First, let’s try and rule out the most common root causes for iPhone WiFi not working.
Reason 1: Modem is OFF

We know this sounds really silly. But make sure your modem is switched ON first. There have been cases where people have contacted Apple Support about WiFi on iPhone not working, only to realize that their modem was switched OFF.
Reason 2: You are out of WiFi range

This sounds silly again. But this is also a common reason why your iPhone may not be able to connect to WiFi. Make sure your WiFi signal is strong and your iPhone is well within router’s range. If you are within WiFi range, you will see the name of your WiFi in Settings > WiFi. Tap the name of your WiFi network to join this network. When prompted enter your WiFi password. Once you’re connected, a blue tick mark appears beside your network name.
Reason 3: Cable not connected to Modem
Well, this may not be obvious but it does happen sometimes. Your router cable may have been disconnected from the modem. There’s no way you can get WiFi signal if your modem and router are not connected. So make sure that you check all cables and connections between router and modem.
Check Also: How to get Free WiFi
How to Fix if WiFi Not Working on iPhone
Not that we have eliminated the most common causes for WiFi not working on iPhone, let’s check out some of the solutions for fixing non-trivial WiFi connection issues.
Fix 1: Restart your iPhone
This solution never ceases to amaze engineers and iPhone users. Every time something happens to your iPhone, the first thing that you should try is the tried-and-tested, mother of all solutions, the classic ‘Restart‘
To restart your iPhone –
- Hold down the Home button and Power button simultaneously
- Continue holding the buttons simultaneously until you see the Apple logo appear on the screen.
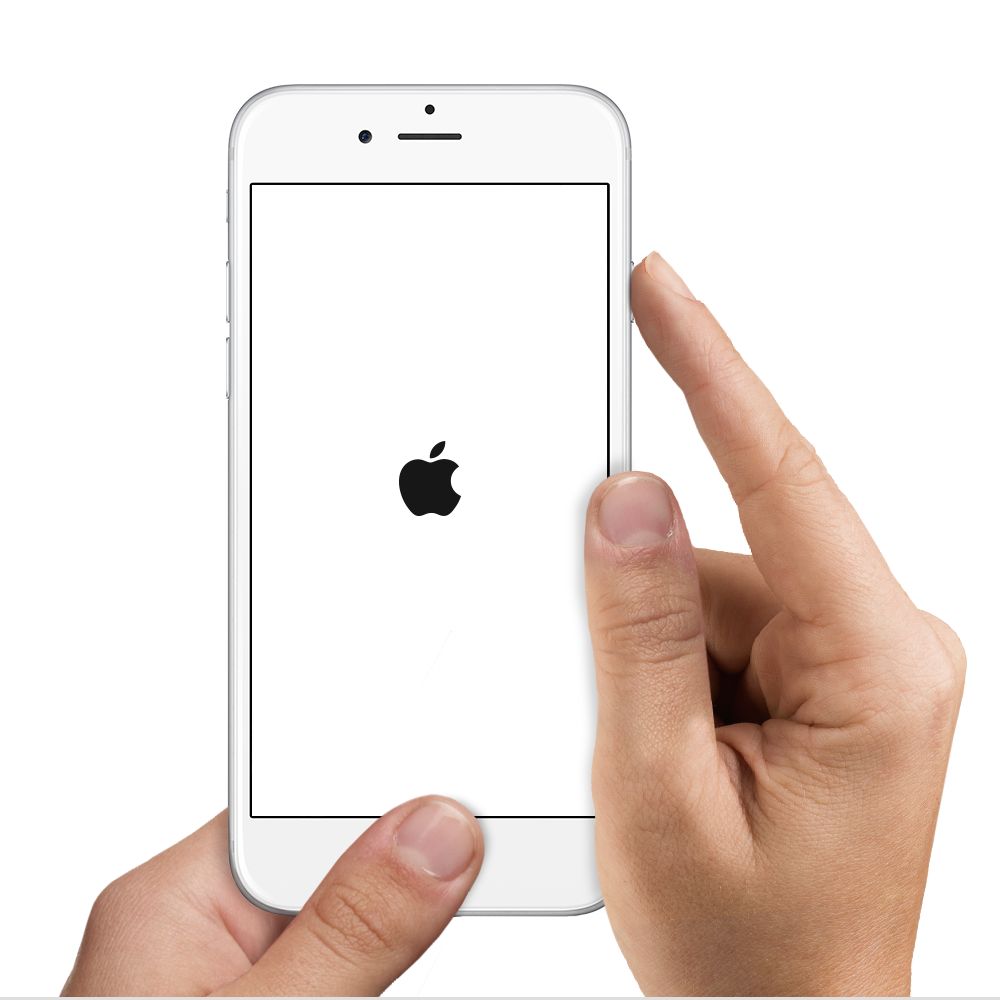
This simple restart almost always fixes WiFi connectivity issues. If you still happen to find WiFi not working, try the next solution.
Fix 2: Rejoin WiFi Network
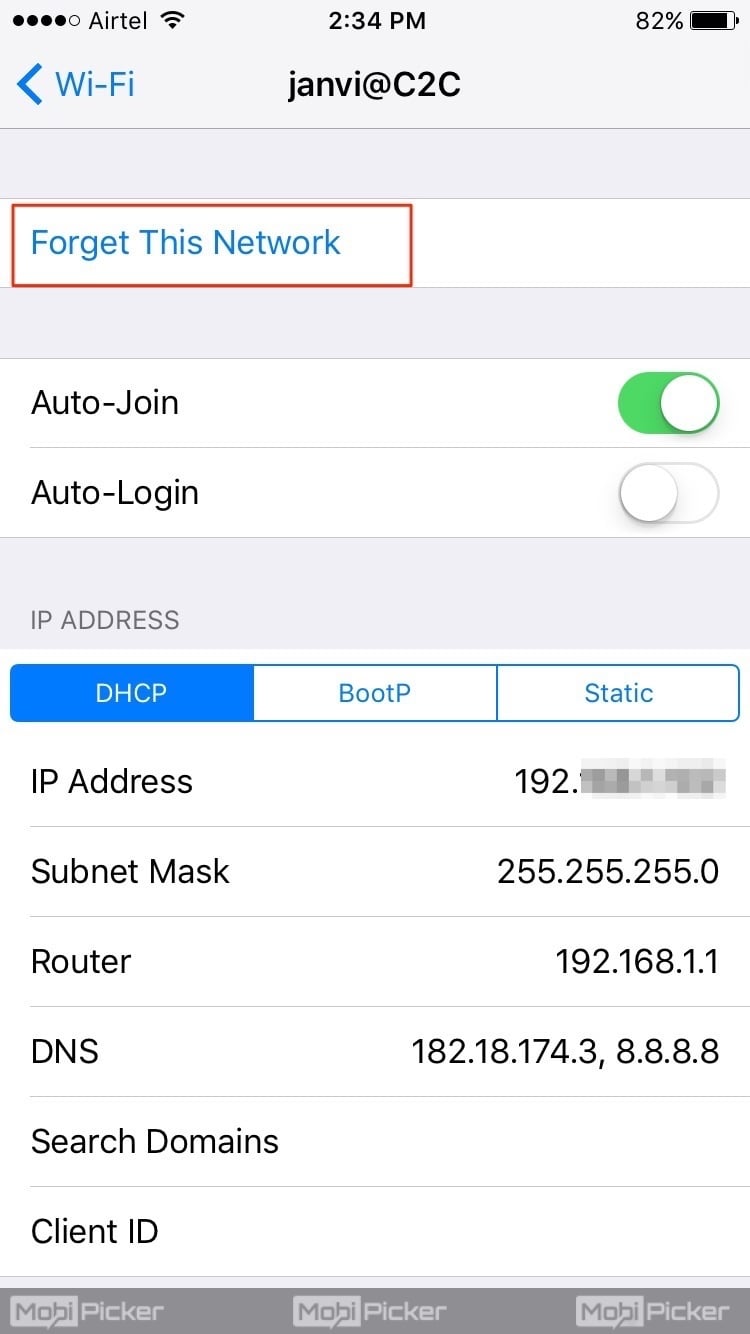
This solution is known to fix WiFi connectivity issues. To rejoin WiFi network, you must first ‘forget’ the network. To forget your WiFi network –
- Head to Settings -> WiFi
- Tap on WiFi Network. Then tap on Forget This Network
To rejoin the network –
- Head back to Settings -> WiFi
- Select your WiFi network
- Enter your WiFi password
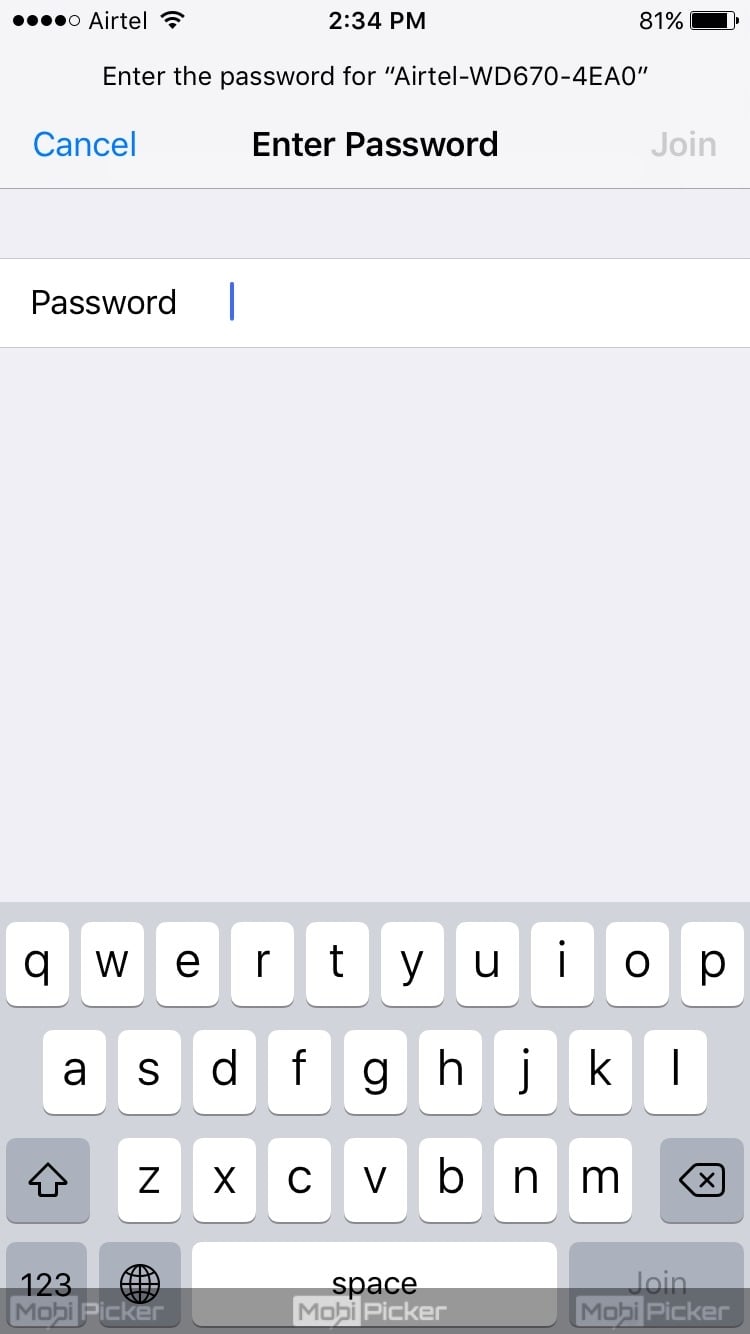
This time, you should be able to connect your iPhone to WiFi. If this doesn’t help either, try solution 3.
Fix 3: Reset Network Settings
Resetting network settings actually fixes WiFi issues. When you reset network, network info is cleared. To reset your network –
- Head to Settings -> General -> Reset
- Tap on Reset Network Settings
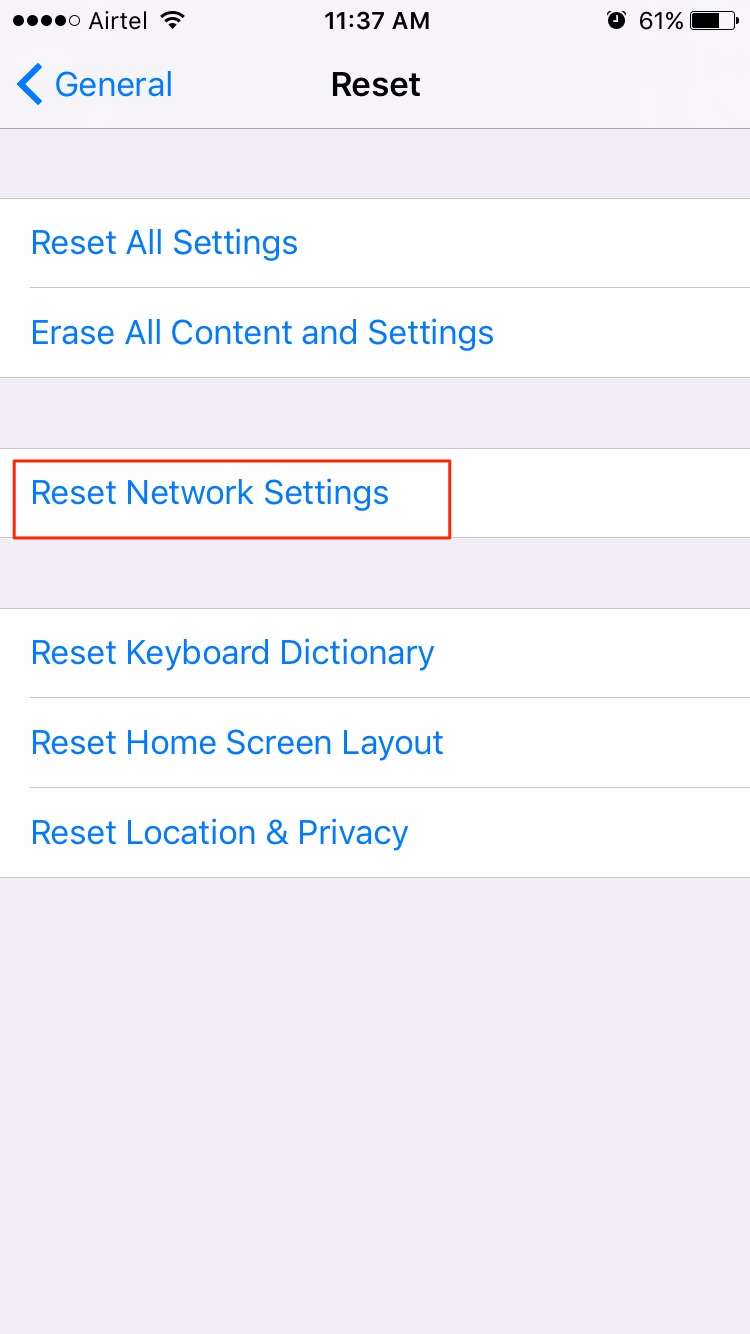
Now, you shouldn’t be facing the problem of WiFi on your iPhone. If this solution too didn’t help, try solution 4.
Fix 4: Switch to open DNS
Often times, WiFi not working on iPhone can be traced to buggy DNS servers. At this point, you may want to try switching from the existing DNS server to Google DNS or OpenDNS. To switch your existing DNS –
- Head to Settings -> WiFi
- Tap on your WiFi network. Tapping gives info about IP Address, Subnet Mask, DNS and Router of your WiFi network.
- Type Google DNS in Primary DNS i.e., type in 8.8.8.8. In Secondary DNS, type in 8.8.4.4. This should be typed as 8.8.8.8, 8.8.4.4 – Primary DNS followed by Secondary DNS separated by the comma. If you choose to use OpenDNS instead, type in 208.67.222.123, 208.67.220.123.
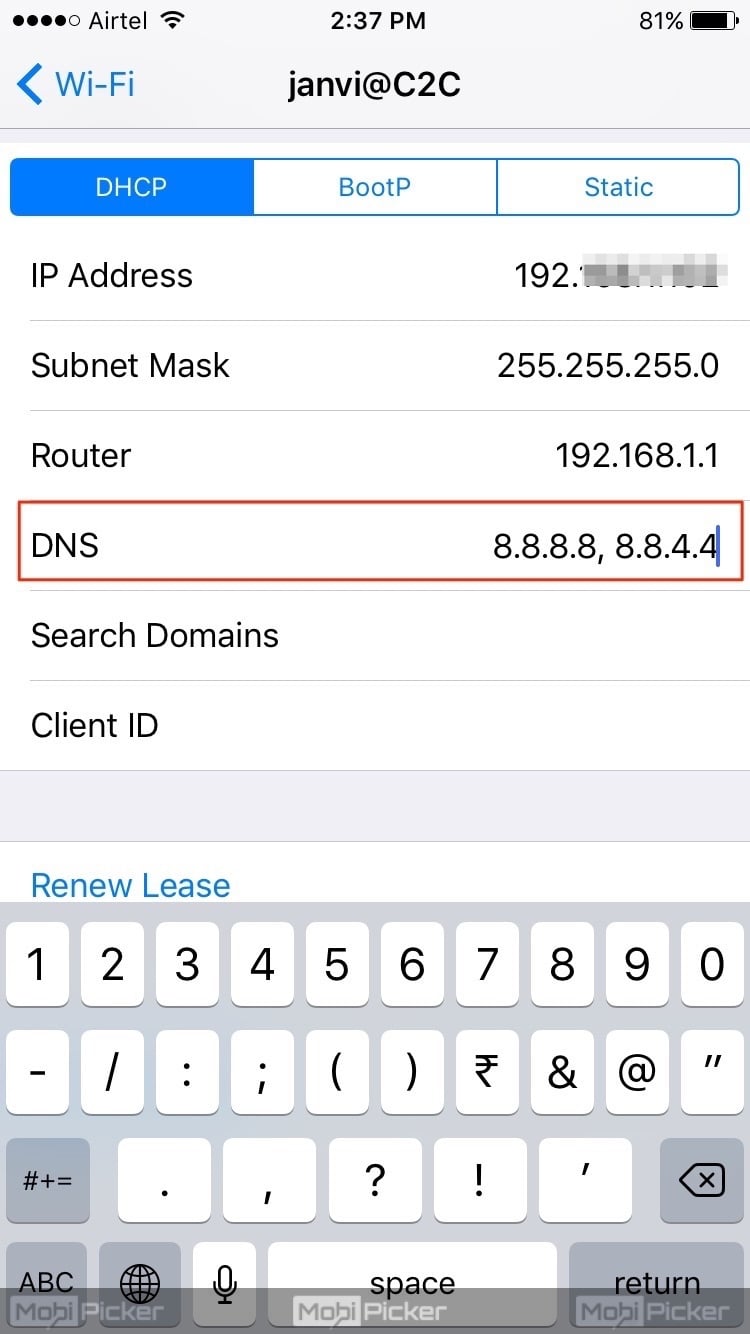
This solution should ideally fix any issues that you may have with WiFi not working on iPhone. But if it doesn’t you may have to restore your iPhone.
Fix 5: Restore your iPhone
This solution is extreme and should not be done unless absolutely necessary. But if you have tried all of the above solutions and still stuck with WiFi issue on iPhone, the situation demands restoring your iPhone.
Restoring iPhone consists of three main steps – Creating backup, erasing all data and restoring the data.
Step 1: Creating Backup
Usually, iCloud backups are triggered when your iPhone is plugged in and connected to WiFi. To trigger the backup manually –
1. Head to Settings. Select iCloud.
2. Tap on Backup. Then tap on Backup Now.
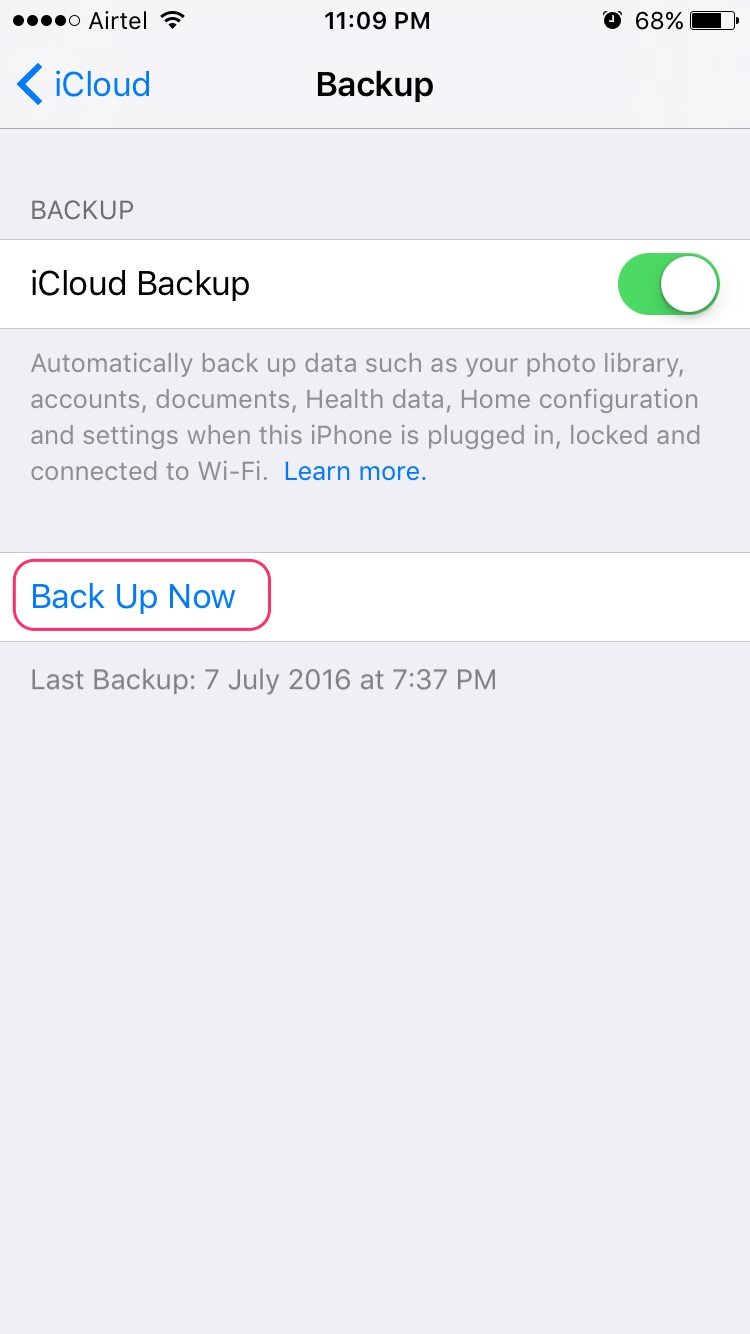
For more info on creating backup of iPhone to iCloud, check out our post on How to Backup iPhone to iCloud – 2 Minutes Guide
Step 2: Using iCloud to erase iPhone
If Find My iPhone was turned on before your iPhone was disabled and if you signed into iCloud, visit Apple: iCloud to erase your iPhone. Here are the steps –
- Sign in with your Apple ID and password
- Choose your iPhone from All My Devices drop-down menu
- Choose Erase iPhone
- Continue to the next section after erasing is done
Step 3: Restore your iPhone
To restore iPhone using iCloud –
- When you start, a Setup Assistant asks if you want to “Restore from iCloud Backup“. Choose this option to restore all data.
- Enter your iCloud username and password when prompted.
- There may be more than one backups to choose from. You should ideally choose the latest backup.
- Once you choose the backup to restore, all you have to do is enter passwords when prompted and wait patiently till all data is restored.
Also see: iPhone keeps restarting [Fix]
And we’re done! Voila – we just fixed the annoying WiFi not working on iPhone issue! Did you find this article useful? Have you tried any other methods to fix WiFi connectivity issues with your iPhone? If yes, we’d love to hear from you in the comments section! If everything failed and you still couldn’t get your iPhone to connect to WiFi, we suggest you to contact Apple Support.
