Kodi 17’s new version called Krypton recently made its appearance on the Play Store. Kodi 17 Krypton comes with a new default skin called Estuary. The default skin adds a sense of pleasantness and is definitely a treat for the eyes. If you are an avid user of Kodi and wish to know how to install Fusion on Kodi 17 Krypton, look no further! This post will cover everything you ever wanted to know about installing Fusion on Kodi 17 Krypton.
Contents

What is Fusion on Kodi
Fusion Kodi is an Addon installer for Kodi app. If you are a Kodi user, Fusion should be your first program to install as you can’t explore all the features without installing Kodi Add-ons. With Fusion on Kodi, you can install all popular add-ons very easily, which we will show at the end of this article.
So let us first proceed for the guide on how to install Fusion on Kodi, and then we will talk about installing Addons with Fusion.
How to install Fusion on Kodi 17 Krypton
Follow the steps below to install Fusion on Kodi 17 Krypton –
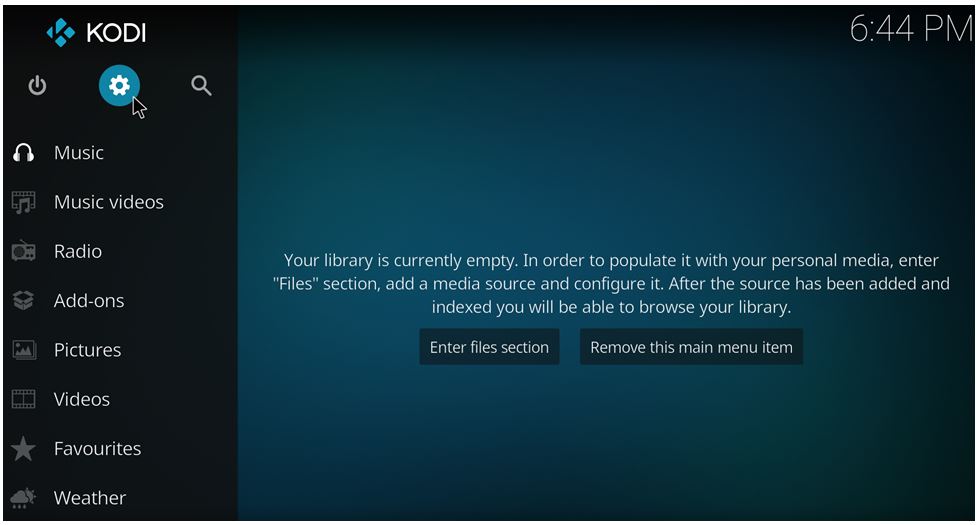
Step 1: Head to Settings (gear icon that you see on the top left).
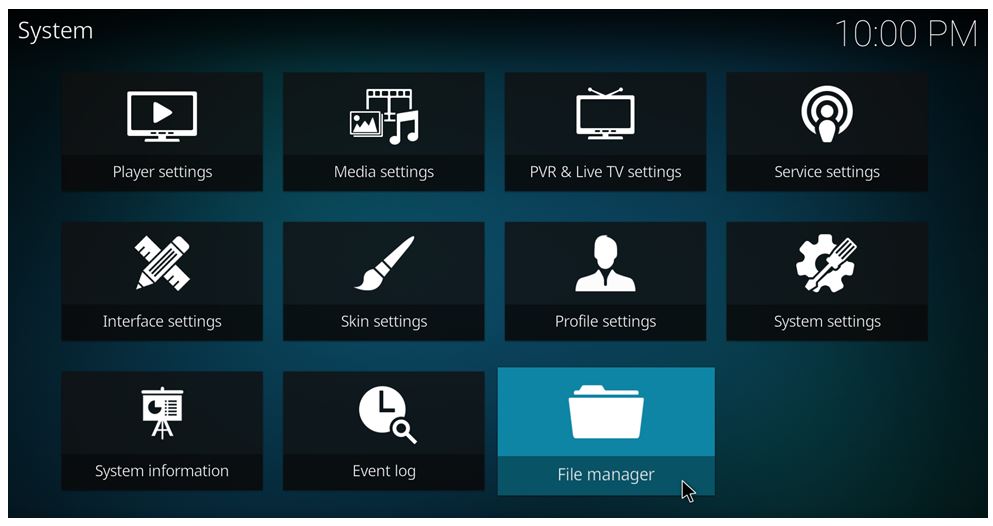
 Step 2: Click on File Manager
Step 3: Select Add Source
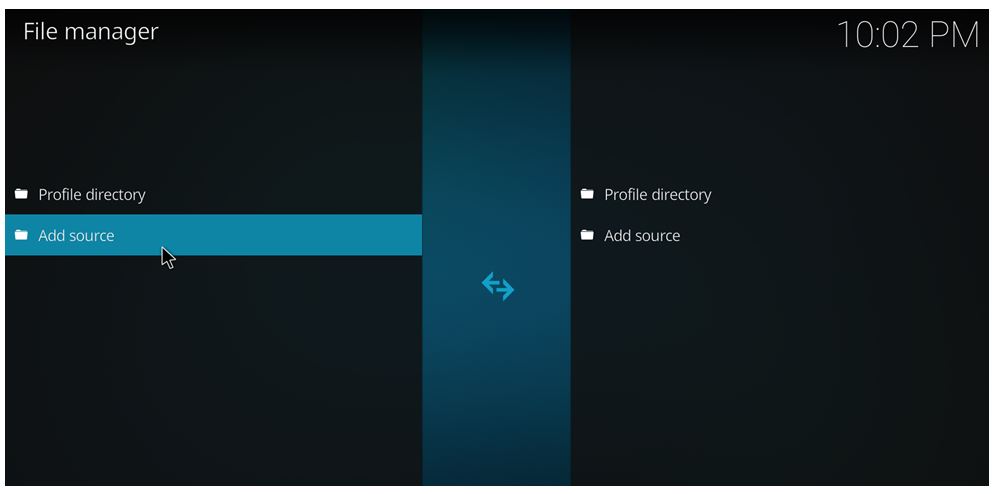
Step 4: In the top box which says “Enter the paths or browse for the media locations”, enter http://fusion.tvaddons.ag/ In the bottom box, enter “fusion” and click OK.
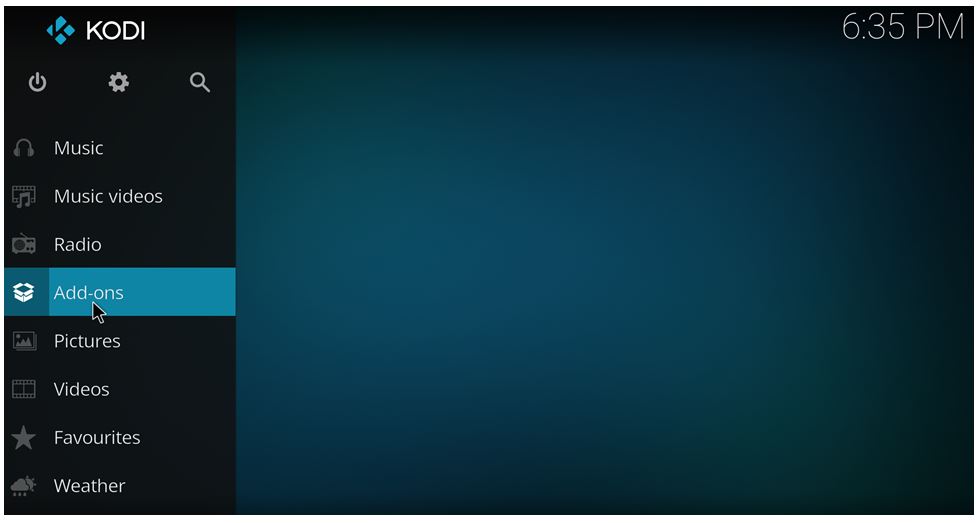
 Step 5: Head to the home screen and select Add-ons
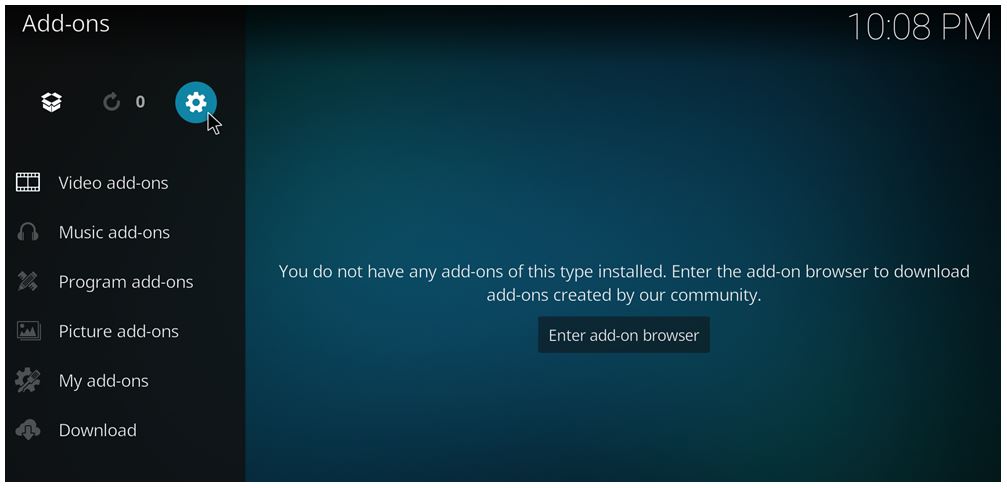
 Step 6: Now Click on the Settings icon that you see on the top left
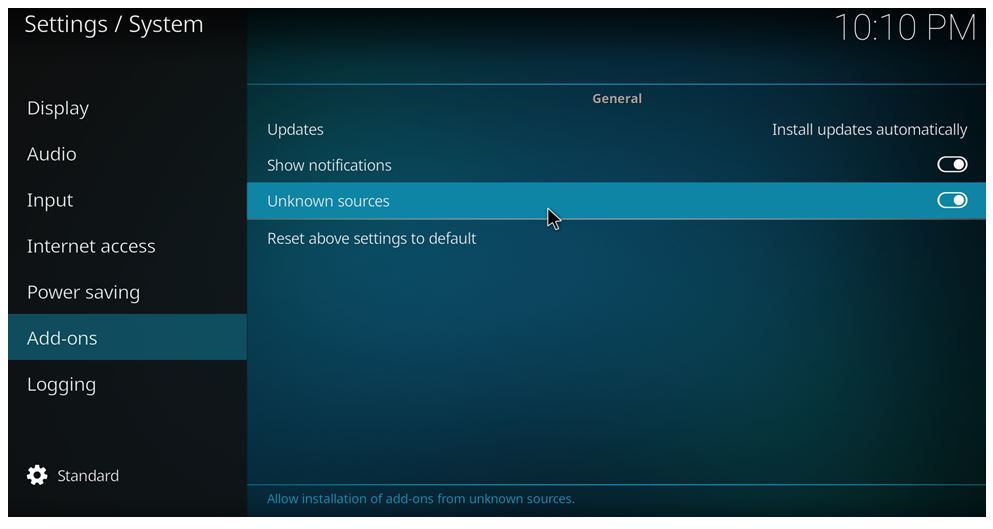
 Step 7: Head to Add-ons. Ensure “Unknown sources” is enabled.
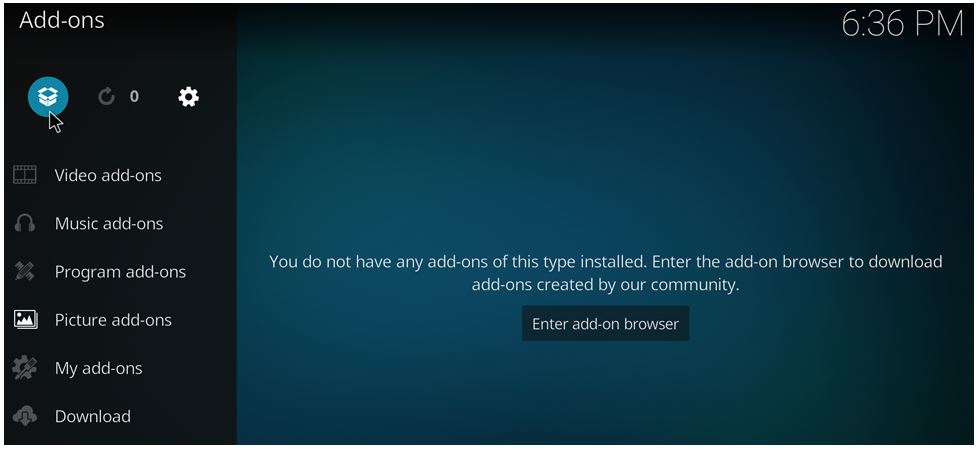
 Step 8: Head back to the Add-ons screen. Select Add-on Browser icon that you see on the top left.
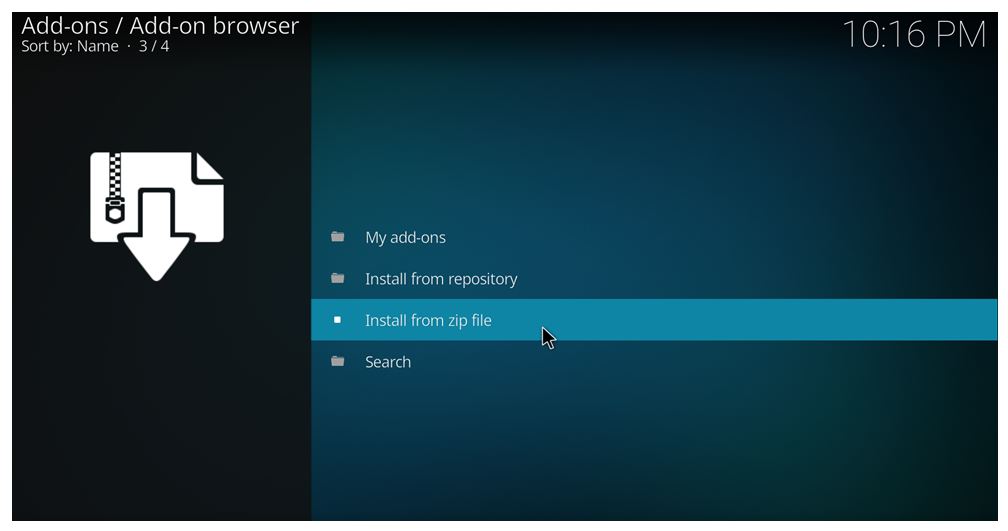
 Step 9: Select Install from ZIP file
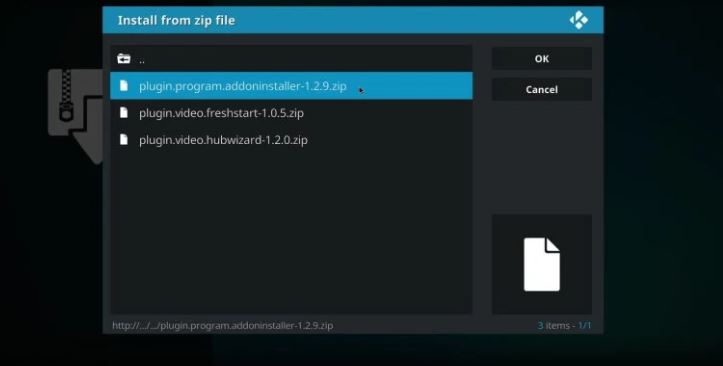
 Step 10: Head to fusion -> begin-here -> plugin.program.addoninstaller.1.2.9.zip. Click on plugin.program.addoninstaller.1.2.9.zip to install the Add-on installer on Kodi 17 Krypton. After a few seconds, you should see a notification that says the add-on has been installed. Note that the number ‘1.2.9’ can change according to versions.
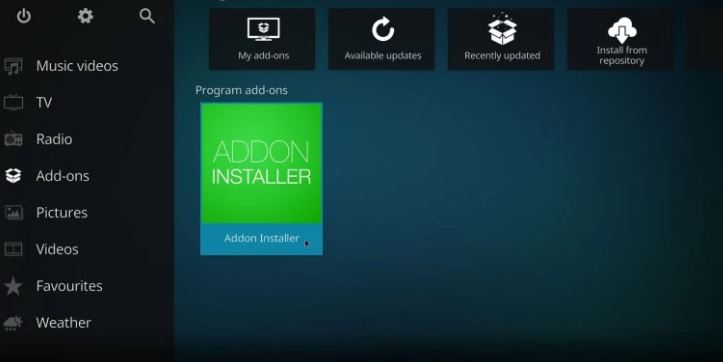
Step 11: Head back to the home screen. Select Add-ons and then click on Addon Installer.
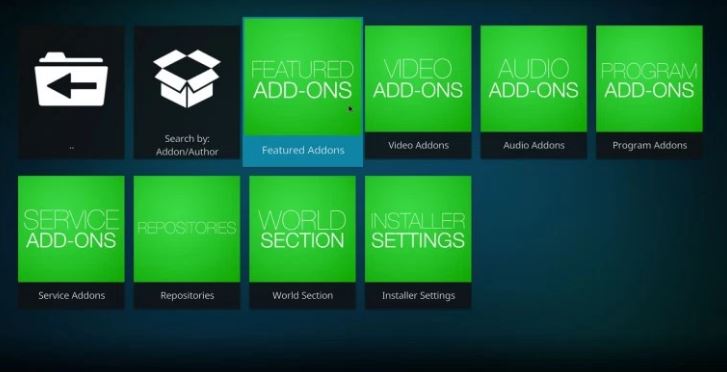
Step 12: You can now check the Featured Addons category for a list of popular add-ons on Kodi 17 Krypton.
Now that you know how to install Fusion Add-on Installer on Kodi 17 Krypton, it’s also important to know how to enable add-ons on Kodi 17 Krypton. Read on!
Also check: How to Install Kodi on Raspberry Pi3
How to Enable Add-ons Using Fusion Addon Installer
Addons that you install using Add-on Installer on Kodi 17 Krypton are disabled by default. To enable them, follow these steps –
Step 1: Head to the home screen. Select Add-ons.
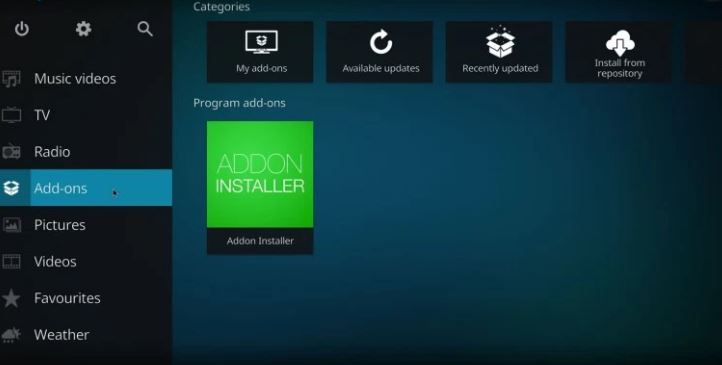 Step 2: Head to My add-ons and select Video Add-ons.
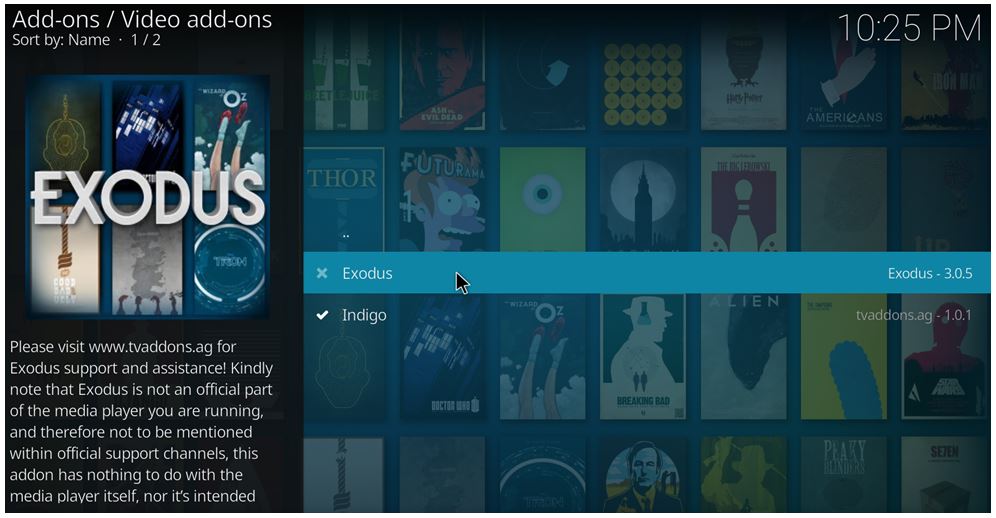
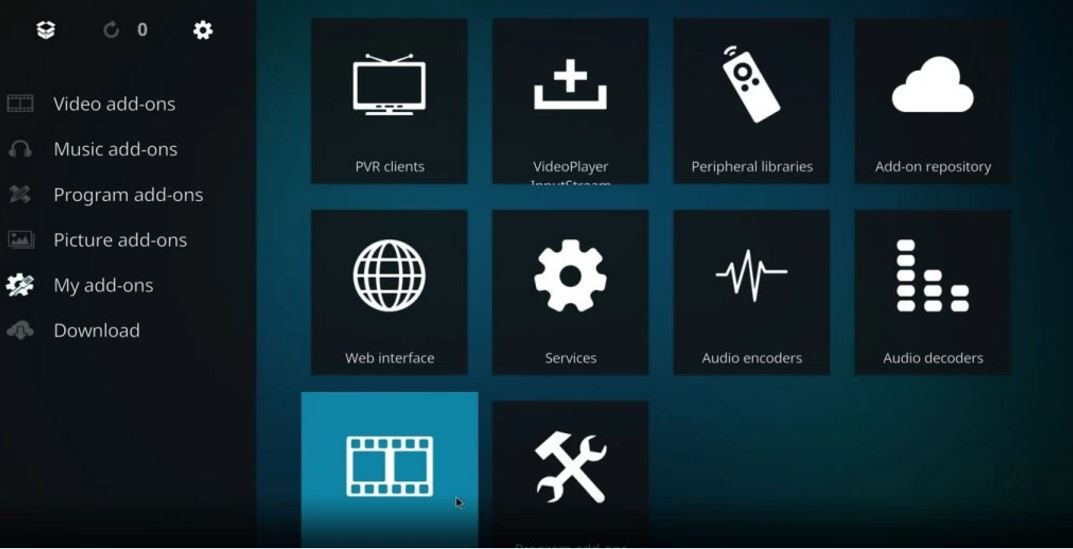 Step 3: Select the add-on you wish to enable
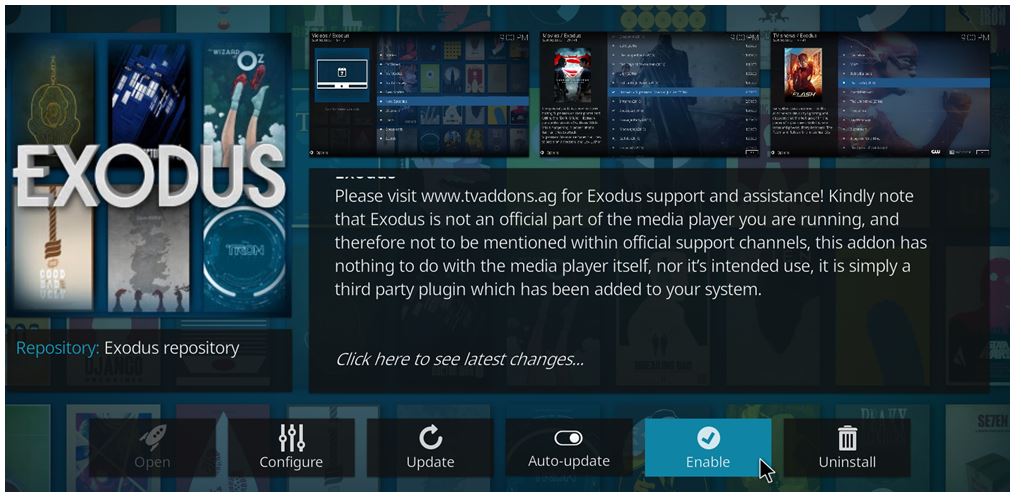
Step 4: Select Enable
The add-ons tab will now list the addons you just installed using Fusion Add-on installer.
Conclusion
You now know how to install Fusion on Kodi 17 Krypton. and how to enable Addons using Fusion Addon installer. If you are facing any problems in the guide mentioned above, feel free to comment below. We would love to help you.
#Update September 26, 2017.
Fusion Not Working on Kodi?
We have been receiving several queries that Fusion is not working on Kodi 17. Well, the case is not with the Kodi version. If you will try on older versions, Fusion will still not work. If you are not aware, Fusion has been shut down along with tvaddons.ag. Hence, you can not install Fusion on Kodi anymore.
Also read: How to install Exodus on Kodi
